SKILLS NECESSARY
3D printing
Additive Manufacturing
Fused Deposition Modeling (FDM)
Rapid Prototyping
Engineering Design
Artistic Design
Troubleshooting
SolidWorks
SUMMARY:
Three small projects taken from my 3 years working in the 3D printing Club @ UC Irvine

Image: CNN
DESCRIPTIONS: In the fall of 2015, I was introduced to an increasingly emergent industry called 3D printing after hearing about it in several lectures. The 2 year old “3D printing club @ UCI” advertised about a seminar they were holding at the beginning of the school year to showcase what was possible to create with consumer-grade 3d printers. I went and by the end of the seminar, I decided to become a regular member of the Club. At that time, 3D printing for “regular people” wasn’t quite mature - but the potential was obvious.
After a year of learning as much as I could from various member projects, I was promoted to the Prototype Head of the 3D Printing Club @UCI. My job was to find new and better ways to translate NEW designs from ANY CADing program (such as Autocad or Solidworks) and create a physical object that could be realistically printed - creating a set of best practices for our Club. This was particularly challenging since it was common the printers themselves would malfunction (mechanically, coding, etc.) and guiding around those inherent machine flaws was certainly a challenge.
My other main responsibility as the Prototype Head was to support other board members with their personal, unique designs and give advice on how to craft their projects with our equipment. As I became a more reliable and consistent voice within the organization, I assumed more responsibility and was a natural pick for president the following year.
To showcase the current printing capabilities to prospective members, I made an assortment of prototypes during my tenure. These 4 projects are my favorite and I will give a brief explanation of each below.


1. Robotic Arm Project
What: Create an articulate and multi-jointed arm that acts like a crane to pick up and manipulate surrounding objects. As a general member, my job was to create a platform that would be mounted on and stabilize the arm
Purpose: This was my first 3D printed design that was actually printed and I wanted to ensure the design was as stable as possible before the control systems of the arm were mounted. Unfortunately, the project remained unfinished due to time constraints...with my part being the only completed part in the whole project. Though the project remained unfinished, my overall feelings for the experience was overwhelmingly positive since I started my path of being able to make parts cheaply and I met people who also enjoyed designing parts they could use for themselves.


2. Star Trek Communicator/Badge
What: In the Star Trek universe, badges personnel wore on spaceships doubled as communication devices. The badge is the shape of a triangular star with a small swoosh. I also added a base so the badge stood on its own.
Purpose: To see if the printer in question could handle more artistic styles of 3D printing, especially lines called “Bezier Curves”. It’s very easy for 3D printers to print sharp edges cleanly but it’s much harder to print curves (especially custom Bezier Curves). The first time it tried to print the badge, the printer completely failed its task and the curves were marked with many jagged edges that were smoothed out the second time the badge was re-designed and printed.
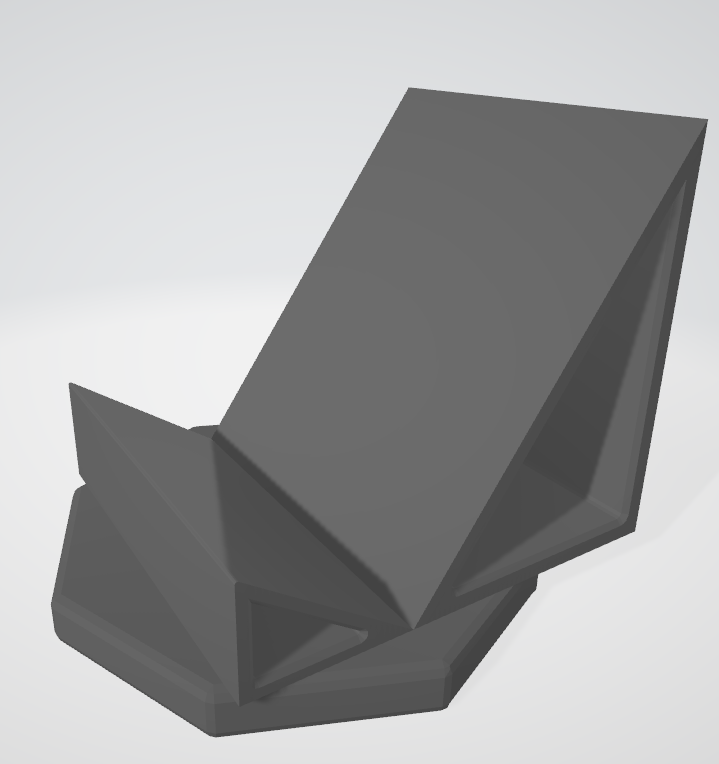

3. Book Stand
What: About a month before phone stands REALLY took off, I finished building a textbook stand that could also store my phone and other accessories. The stand was designed with a cavity that housed a counterweight in the back to resist the larger torque created from heavy textbooks.
Purpose: During my 4th year in college, my neck was not agreeing with the seating I was using when reading textbooks due to intensive studying. I went to a chiropractor for my neck & back pains and I was told to change my reading posture and that’s when I decided to make the stand.
Designing the stand was relatively simple with the only trouble controlling the different torques. My final design is able to hold textbooks of about 350 pages with no counterweights. After that, the stand needs a counterweight. The need for the counterweight arises from the fact that 3D printed items are never fully filled in for the volume. Typical values for density range from 15%-40% infill. An example of what infill means: imagine you wish to build a 1 ft^3 cube and you set the density to 20%; the printer would lay down 0.2 ft^3 of material and 0.8 ft^3 of empty space inside the cube - with a honeycomb pattern as default. Note: if you set infill to over 40%, diminishing returns occur between structural integrity and amount of material used; you also significantly increase the chance of your 3d printer jamming and was a major guideline I implemented for the Club).